- idrather
- What you’ll need
- Testing Your Setup
- Video recordings
- Course slides
- Working with YAML
- YAML is a superset of JSON
- YAML syntax
- Comparing JSON to YAML
- Some features of YAML not present in JSON
- JSON versus YAML for the spec format
- Review and summary
- The root-level objects in OpenAPI spec
- Swagger
- Sample info object
- Description properties and Markdown
- Update your file in Swagger Editor
- Sample info object
- Description properties and Markdown
- Update your file in Swagger Editor
idrather
What you’ll need
Here are a few tools you’ll need to do the activities in this course:
- Computer. You need a computer (if attending the live workshop, a laptop and charging cord), as there are many activities to work through.
- Text editor. If you don’t already have a favorite text editor, download Sublime Text, as it works well on both Mac and Windows and is free. If you have another text editor you prefer (e.g., Visual Studio Code, Atom, or even Notepad++), that will work too. Just make sure you can write code in plain text.
- Chrome browser. Chrome provides a Javascript Console that works well for inspecting JSON, so we’ll be using Chrome. Also, in order to read JSON responses more easily in the browser, install the JSON Formatter Chrome extension.
- Postman. Postman is an app that allows you to make requests and see responses through a visual client. Make sure you download the app and not the Chrome extension.
- curl. curl is essential for making requests to endpoints from the command line. Mac already has curl built-in, but it might not be available by default on Windows. (Some Windows 10 builds already have it in Powershell.) On Windows, open a Command Prompt and type
curl -V. If it’s not installed, go to confusedbycode.com/curl and install a version (usually “With Administrator Privileges (free), 64-bit”). Close and re-open your Command Prompt and try typingcurl -Vagain. - Git. Git is a version control tool developers often use to collaborate on code. For Windows, see https://gitforwindows.org/ to set up Git and the Git BASH terminal emulator. For Mac, see Downloading Git.
- GitHub account. GitHub will be used for various activities, sometimes to demonstrate the Git workflow and other times as an authentication service for developer tools. If you don’t already have a GitHub account, sign up for one.
- Stoplight Studio Editor. When working with the OpenAPI specification, we’ll use the Stoplight Studio Editor. Stoplight Studio provides visual modeling tools for working with the OpenAPI specification. Stoplight offers both a web browser and standalone app versions of the editor. We’ll be using the web browser version because it provides more complete functionality (such as trying out requests). Go to https://stoplight.io/studio and log in with GitHub.
- OpenWeatherMap API key. We’ll be using the OpenWeatherMap API for some exercises. It takes a couple of hours for the OpenWeatherMap API key to become active, so it’s best if you get the API key ahead of time — then when you get to the OpenWeatherMap API activities, you’ll be all set. To get your (free) OpenWeatherMap API key, go to https://openweathermap.org/. Click Sign Up in the top nav bar and create an account. After you sign up, OpenWeatherMap sends you an API key to your email. you can also find it when you log in and click the API Keys tab from the dashboard. Copy the key into a place you can easily find it.
Testing Your Setup
In the past, people have asked for some tests to check whether their laptops are correctly set up.
- If you want to test whether Postman works, open up the Postman app and paste this into the GET box:
https://api.openweathermap.org/data/2.5/weather?zip=95050&units=imperial&appid=126cac1a482f51de0f1287b45ae2bf9a. Then click Send. If you get a response, it’s working correctly. (In rare cases, sometimes people have security restrictions on their computers that block all network access.) - If you want to test whether curl is installed, open Terminal (on Mac) or Command Prompt (on Windows) and paste in
curl --get "https://api.openweathermap.org/data/2.5/weather?zip=95050&units=imperial&appid=126cac1a482f51de0f1287b45ae2bf9a". If you get a JSON response, you’re good. - To check whether Git is installed, open up Terminal (on Mac) or Command Prompt (on Windows) and type
git --version. If it’s installed, you’ll see the version.
Video recordings
For video recordings of this course, see the Video recordings of API doc workshops. The page lists the most recent video recordings available. The video doesn’t go into the same level of detail as the written material, but it would be a good start.
Course slides
For the live workshops, I have various slides that cover different sections of this course. See Course Slides for the links. The slides use RevealJS, which is an HTML/CSS/JS framework for slides. The images are single-sourced between the site and the slides, so they’ll more likely stay in sync.
Working with YAML
YAML is easier to work with because it removes the brackets, curly braces, and commas that get in the way of reading content.
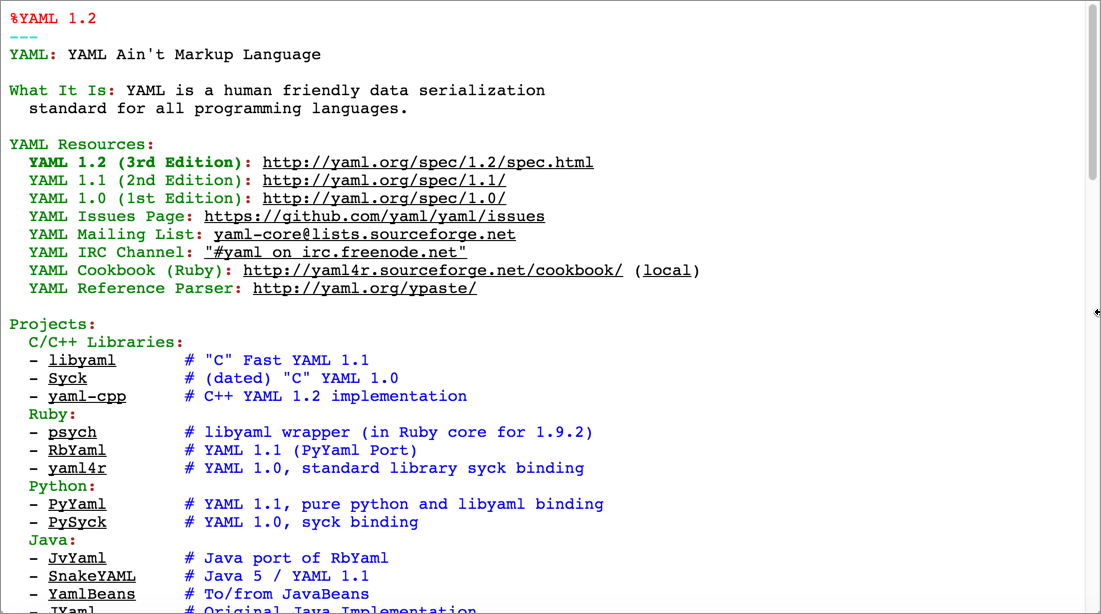
YAML is an attempt to create a more human-readable data exchange format. It’s similar to JSON (which is actually a subset of YAML) but uses spaces, colons, and hyphens to indicate the structure.
Many computers ingest data in a YAML or JSON format. It’s a syntax commonly used in configuration files and an increasing number of platforms (like Jekyll), so it’s a good idea to become familiar with it.
YAML is a superset of JSON
For the most part, YAML and JSON are different ways of structuring the same data. Dot notation accesses the values the same way. For example, the Swagger UI can read the openapi.json or openapi.yaml files equivalently. Pretty much any parser that reads JSON will also read YAML. However, some JSON parsers might not read YAML because there are a few features YAML has that JSON lacks (more on that below).
YAML syntax
With a YAML file, spacing is significant. Each two-space indent represents a new level:
level1:
  level2:
    level3:
Each new level is an object. In this example, the level1 object contains the level2 object, which contains the level3 object.
With YAML, you generally don’t use tabs (since tab spacing is non-standard). Instead, you space twice.
Each level can contain either a single key-value pair (also referred to as a dictionary in YAML lingo) or a sequence (a list of hyphens):
level3:
  -
    itema: "one"
    itemameta: "two"
  -
    itemb: "three"
    itembmeta: "four"
The values for each key can optionally be enclosed in quotation marks. If your value has a colon or quotation mark in it, enclose it in quotation marks.
Comparing JSON to YAML
Earlier in the course, we looked at various JSON structures involving objects and arrays. So let’s look at the equivalent YAML syntax for each of these same JSON objects.
You can use Unserialize.me to make the conversion from JSON to YAML or YAML to JSON.
Here are some key-value pairs in JSON:
{
"key1":"value1",
"key2":"value2"
}
Here’s the same structure expressed in YAML syntax:
key1: value1
key2: value2
Here’s an array (list of items) in JSON:
["first", "second", "third"]
In YAML, the array is formatted as a list with hyphens:
- first
- second
- third
Here’s an object containing an array in JSON:
{
"children": ["Avery","Callie","lucy","Molly"],
"hobbies": ["swimming","biking","drawing","horseplaying"]
}
Here’s the same object with an array in YAML:
children:
  - Avery
  - Callie
  - lucy
  - Molly
hobbies:
  - swimming
  - biking
  - drawing
  - horseplaying
Here’s an array containing objects in JSON:
[
   {
      "name":"Tom",
      "age":43
   },
   {
      "name":"Shannon",
      "age":41
   }
]
Here’s the same array containing objects converted to YAML:
-
  name: Tom
  age: 42
-
  name: Shannon
  age: 41
Hopefully, by seeing the syntax side by side, it will begin to make more sense. Is the YAML syntax more readable? It might be difficult to see in these simple examples, but generally it is.
JavaScript uses the same dot notation techniques to access the values in YAML as it does in JSON. (They’re pretty much interchangeable formats.) The benefit to using YAML, however, is that it’s more readable than JSON.
However, YAML might be more tricky because it depends on getting the spacing just right. Sometimes that spacing is hard to see (especially with a complex structure), and that’s where JSON (while maybe more cumbersome) is perhaps easier to troubleshoot.
Some features of YAML not present in JSON
YAML has some features that JSON lacks. You can add comments in YAML files using the # sign. YAML also allows you to use something called “anchors.” For example, suppose you have two definitions that are similar. You could write the definition once and use a pointer to refer to both:
api: &apidef Application programming interface
application_programming_interface: *apidef
If you access the value, the same definition will be used for both. The *apidef acts as an anchor or pointer to the definition established at &apidef.
You won’t use these unique YAML features in the OpenAPI tutorial, but they’re worth noting because JSON and YAML aren’t entirely equivalent. For details on other differences between JSON and YAML, see Learn YAML in Minutes. To learn more about YAML, see this YAML tutorial.
YAML is also used with Jekyll. See my YAML tutorial in the context of Jekyll for more details.
JSON versus YAML for the spec format
Let’s clear up some additional descriptors around JSON and YAML as well. The specification document in my OpenAPI tutorial uses YAML (which I introduced briefly here), but it could also be expressed in JSON. JSON is a subset of YAML, so the two are practically interchangeable formats (for the data structures we’re using). Ultimately, though, the OpenAPI spec is a JSON object. The specification notes:
An OpenAPI document that conforms to the OpenAPI Specification is itself a JSON object, which may be represented either in JSON or YAML format. (See Format)
In other words, the OpenAPI document you create is a JSON object, but you have the option of expressing the JSON using either JSON or YAML syntax. YAML is more readable and is a more common format (see API Handyman’s take on JSON vs YAML for more discussion), so I’ve used YAML exclusively in code samples here. You will see that the OpenAPI specification documentation on GitHub always shows both the JSON and YAML syntax when showing specification formats. (For a more detailed comparison of YAML versus JSON, see “Relation to JSON” in the YAML spec.)
YAML refers to data structures with three main terms: “mappings (hashes/dictionaries), sequences (arrays/lists) and scalars (strings/numbers)” (see “Introduction” in YAML 1.2). However, because the OpenAPI spec is a JSON object, it uses JSON terminology — such as “objects,” “arrays,” “properties,” “fields,” and so forth. As such, I’ll be showing YAML-formatted content but describing it using JSON terminology.
Review and summary
So that we’re on the same page with terms in the upcoming tutorial, let’s briefly review. Each level in YAML (defined by a two-space indent) is an object. In the following code, california is an object. animal, flower, and bird are properties of the california object.
california:
  animal: Grizzly Bear
  flower: Poppy
  bird: Quail
Here’s what this looks like in JSON:
{
  "california": {
    "animal": "Grizzly Bear",
    "flower": "Poppy",
    "bird": "Quail"
  }
}
The specification often uses the term “field” in the titles and table column names when listing the properties for a specific object. (Further, it identifies two types of fields — “fixed” fields are declared, unique names while “patterned” fields are regex expressions.) Fields and properties are used synonymously in the OpenAPI spec.
In the following code, countries contains an object called united_states, which contains an object called california, which contains several properties with string values:
countries:
  united_states:
    california:
      animal: Grizzly Bear
      flower: Poppy
      bird: Quail
In the following code, demographics is an object that contains an array:
demographics:
 - population
 - land
 - rivers
Here’s what the above code looks like in JSON:
{
  "demographics": [
    "population",
    "land",
    "rivers"
  ]
}
Hopefully, those brief examples will help align us with the terminology used in the tutorial.
Before diving into the first step of the OpenAPI tutorial here, read the OpenAPI tutorial overview (if you haven’t already) to get a sense of the scope of this tutorial. In brief, this OpenAPI tutorial is unique in the following ways:
- This OpenAPI tutorial shows the spec in context of a simple weather API introduced earlier in this course.
- This OpenAPI tutorial shows how the spec information gets populated in two different tools and display frameworks: Stoplight and Swagger UI.
- This OpenAPI tutorial is a subset of the information in both the OpenAPI specification and the OpenAPI specification commentary. In other words, it’s not comprehensive of all the possible information in the spec.
- This OpenAPI tutorial covers the 3.0 version of the OpenAPI spec, which is the latest version. (Surprisingly, many tools still support only the 2.0 version.)
The root-level objects in OpenAPI spec
The OpenAPI 3.0 spec has eight objects at the root level. These eight objects have many nested objects inside them, but at the root level, there are just these parent objects:
By “root level,” I mean the first level in the OpenAPI document. This level is also referred to as the global level because some object properties declared here (namely servers and security) are applied to each of the operation objects unless overridden at a lower level.
The whole document (the object that contains these eight root-level objects) is called an OpenAPI document. The convention is to name the document openapi.yml.
“OpenAPI” refers to the specification; “Swagger” refers to the tooling (at least from SmartBear) that supports the OpenAPI specification.
Although one could approach the assembly of an OpenAPI document in many ways, I’ve decided to structure each step in this tutorial based on each of these root-level objects. You’ll see two approaches: one using Swagger working at a code-level, and another using Stoplight Studio working in a user interface.
Swagger
Before we jump into coding, let’s first talk about where you’ll write the code and what your options are.
The info object contains basic information about your API, including the title, a description, version, link to the license, link to the terms of service, and contact information. Many of the properties are optional.
Sample info object
Here’s an example of the info object and its properties. (The openapi object and the empty paths object are commented out to maintain the focus on the info object.)
# openapi: 3.0.2
info:
  title: "OpenWeatherMap API"
  description: "Get the current weather, daily forecast for 16 days, and a three-hour-interval forecast for 5 days for your city. Helpful stats, graphics, and this day in history charts are available for your reference. Interactive maps show precipitation, clouds, pressure, wind around your location stations. Data is available in JSON, XML, or HTML format. **Note**: This sample Swagger file covers the `current` endpoint only from the OpenWeatherMap API. <br/><br/> **Note**: All parameters are optional, but you must select at least one parameter. Calling the API by city ID (using the `id` parameter) will provide the most precise location results."
  version: "2.5"
  termsOfService: "https://openweathermap.org/terms"
  contact:
    name: "OpenWeatherMap API"
    url: "https://openweathermap.org/api"
    email: "[email protected]"
  license:
    name: "CC Attribution-ShareAlike 4.0 (CC BY-SA 4.0)"
    url: "https://openweathermap.org/price"
# paths: {}
Description properties and Markdown
Note that in any description property, you can use CommonMark Markdown, which is much more precise, unambiguous, and robust than the original Markdown.
For example, CommonMark markdown offers some backslash escapes, and it specifies exactly how many spaces you need in lists and other punctuation. You can also break to new lines with \n and escape problematic characters like quotation marks or colons with a backslash.
As you write content in description properties, note that colons are problematic in YAML because they signify new levels. Either enclose the description value in quotation marks or escape colons with a backslash. (If you enclose the values in quotation marks, syntax highlighters in text editors can display better color coding between the properties and values.)
Update your file in Swagger Editor
To update the spec file in Swagger Editor:
- Paste the above code containing the
infoobject into the Swagger Editor. -
Uncomment the
openapiandpathsobjects (remove the “#”). The display looks as follows:In the Swagger UI display, the
infoobject’s information appears below the title.
In the description property, in addition to describing your overall API, you might want to provide some basic instructions to users on how to use Swagger UI. If there’s a test account they should use, you can provide the information they need in this space.
Where to write your spec code
The easiest option is to use the online Swagger Editor. The Swagger Editor provides a split view: on the left where you write your spec code, and on the right, you see a fully functional Swagger UI display. You can even submit requests from the Swagger UI display in this editor.
The Swagger Editor will validate your content in real-time, and you will see validation errors until you finish coding the specification document. Don’t worry about the errors unless you see X marks in the code you’re working on.
I usually keep a local text file (using a text editor such as Atom or Sublime Text) where I keep the specification document offline, but I work with the document’s content in the online Swagger Editor. When I’m done working for the day, I copy and save the content back to my local file. Even so, the Swagger Editor caches the content quite well (just don’t clear your browser’s cache), so you probably won’t need your local file as a backup.
If you want to purchase a subscription to SwaggerHub, you could keep your spec content in the cloud (SwaggerHub has an editor almost identical to Swagger UI) associated with your personal login. SwaggerHub is the premium tooling for the open-source and free Swagger Editor.
Another option to work locally is to use Visual Studio Code with two extensions: openapi-lint and Swagger Viewer. These extensions let you work locally and preview a live version of Swagger. You can also download and run the Swagger Editor locally.
For the sake of simplicity, for the Swagger sections in this tutorial, we’ll just use the online Swagger Editor.
Add the openapi object
From the Swagger Editor and go to File > Clear editor. Keep this tab open throughout the OpenAPI tutorial, as you’ll be adding to your specification document with each step.
Add the first root-level property for the specification document: openapi. In the openapi object, indicate the version of the OpenAPI spec to validate against. The latest version is 3.0.2.
openapi: "3.0.2"
Until you add more information in here, you’ll see error messages and notes such as “No operations defined in spec!” To avoid these errors, add some placeholder info here like this:
openapi: '3.0.2'
info:
  title: OpenWeatherMap
  version: '1.0'
paths: {}
The editor renders the display as follows.
On the backend, Swagger UI uses the 3.0.2 version of the spec to validate your content. In the above screenshot, the gray “1.0” version refers to the version of the API here, not the version of the OpenAPI spec.
There’s not much to the openapi object except to elaborate on the versions. OAS 3.0 was released on 2017-07-26, and OAS 3.0.2 was released on 10-08-2018 (see Version History). Much of the information and examples online, as well as supporting tools, often focus only on 2.0. Even if you’re locked into publishing in a 2.0 tool or platform, you can code the spec in 3.0 and then use a tool such as APIMATIC Transformer to convert the 3.0 spec to 2.0. You can also convert a spec from 2.0 to 3.0.
The info object contains basic information about your API, including the title, a description, version, link to the license, link to the terms of service, and contact information. Many of the properties are optional.
Sample info object
Here’s an example of the info object and its properties. (The openapi object and the empty paths object are commented out to maintain the focus on the info object.)
# openapi: 3.0.2
info:
  title: "OpenWeatherMap API"
  description: "Get the current weather, daily forecast for 16 days, and a three-hour-interval forecast for 5 days for your city. Helpful stats, graphics, and this day in history charts are available for your reference. Interactive maps show precipitation, clouds, pressure, wind around your location stations. Data is available in JSON, XML, or HTML format. **Note**: This sample Swagger file covers the `current` endpoint only from the OpenWeatherMap API. <br/><br/> **Note**: All parameters are optional, but you must select at least one parameter. Calling the API by city ID (using the `id` parameter) will provide the most precise location results."
  version: "2.5"
  termsOfService: "https://openweathermap.org/terms"
  contact:
    name: "OpenWeatherMap API"
    url: "https://openweathermap.org/api"
    email: "[email protected]"
  license:
    name: "CC Attribution-ShareAlike 4.0 (CC BY-SA 4.0)"
    url: "https://openweathermap.org/price"
# paths: {}
Description properties and Markdown
Note that in any description property, you can use CommonMark Markdown, which is much more precise, unambiguous, and robust than the original Markdown.
For example, CommonMark markdown offers some backslash escapes, and it specifies exactly how many spaces you need in lists and other punctuation. You can also break to new lines with \n and escape problematic characters like quotation marks or colons with a backslash.
As you write content in description properties, note that colons are problematic in YAML because they signify new levels. Either enclose the description value in quotation marks or escape colons with a backslash. (If you enclose the values in quotation marks, syntax highlighters in text editors can display better color coding between the properties and values.)
Update your file in Swagger Editor
To update the spec file in Swagger Editor:
- Paste the above code containing the
infoobject into the Swagger Editor. -
Uncomment the
openapiandpathsobjects (remove the “#”). The display looks as follows:In the Swagger UI display, the
infoobject’s information appears below the title.
In the description property, in addition to describing your overall API, you might want to provide some basic instructions to users on how to use Swagger UI. If there’s a test account they should use, you can provide the information they need in this space/
The following wiki, pages and posts are tagged with
| Title | Type | Excerpt |
|---|---|---|
| D3js trial and errors | post | Thursday, trying to integrate with jekyll and data mining |
| Weather app from firebase | post | Sunday-weather-app, open weather api |
{# nothing on index to avoid visible raw text #}